We are lucky that Google has made it very easy to migrate your data (texts, call logs, contacts, music, and photos) over to your new phone, and this article will let you know how to transfer data from old phone to new. Before moving forward, you will need to make sure that you follow the first and most important step.
How to Transfer Data from Your Old Android Phone to a New One?
Step 1 (Back up Data on Your Old Android Phone): In order to transfer your data from an older Android phone to a newer one, you’ll have to make sure that all of your precious data on your old phone is backed up to the Google cloud before you migrate to a new Android phone. Google automatically backs up contacts, call logs, texts, and settings to your Drive, thus you’ll be able to retrieve all that data to your new Android phone just by logging in with your Google account.
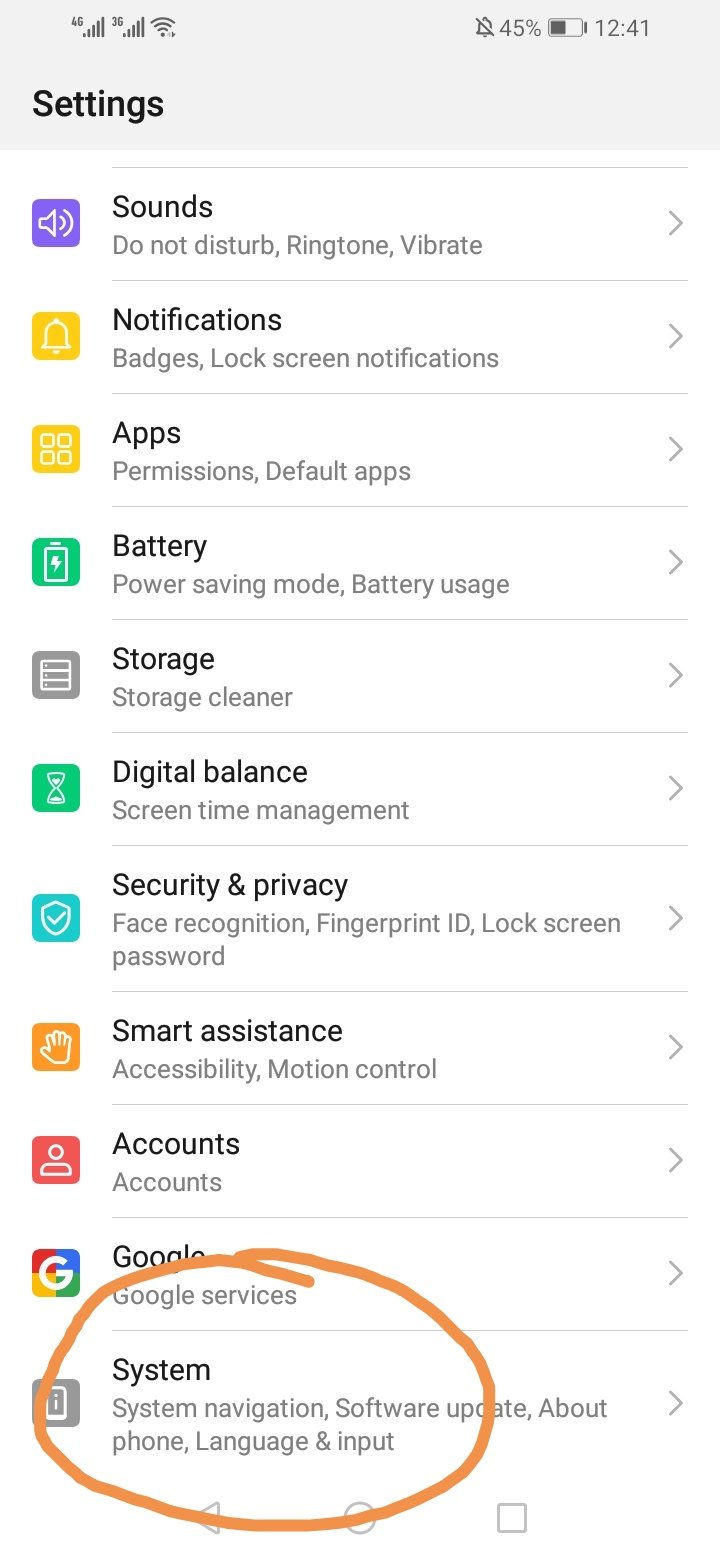
First, visit the Settings menu on your phone and click on the system as illustrated in the image.
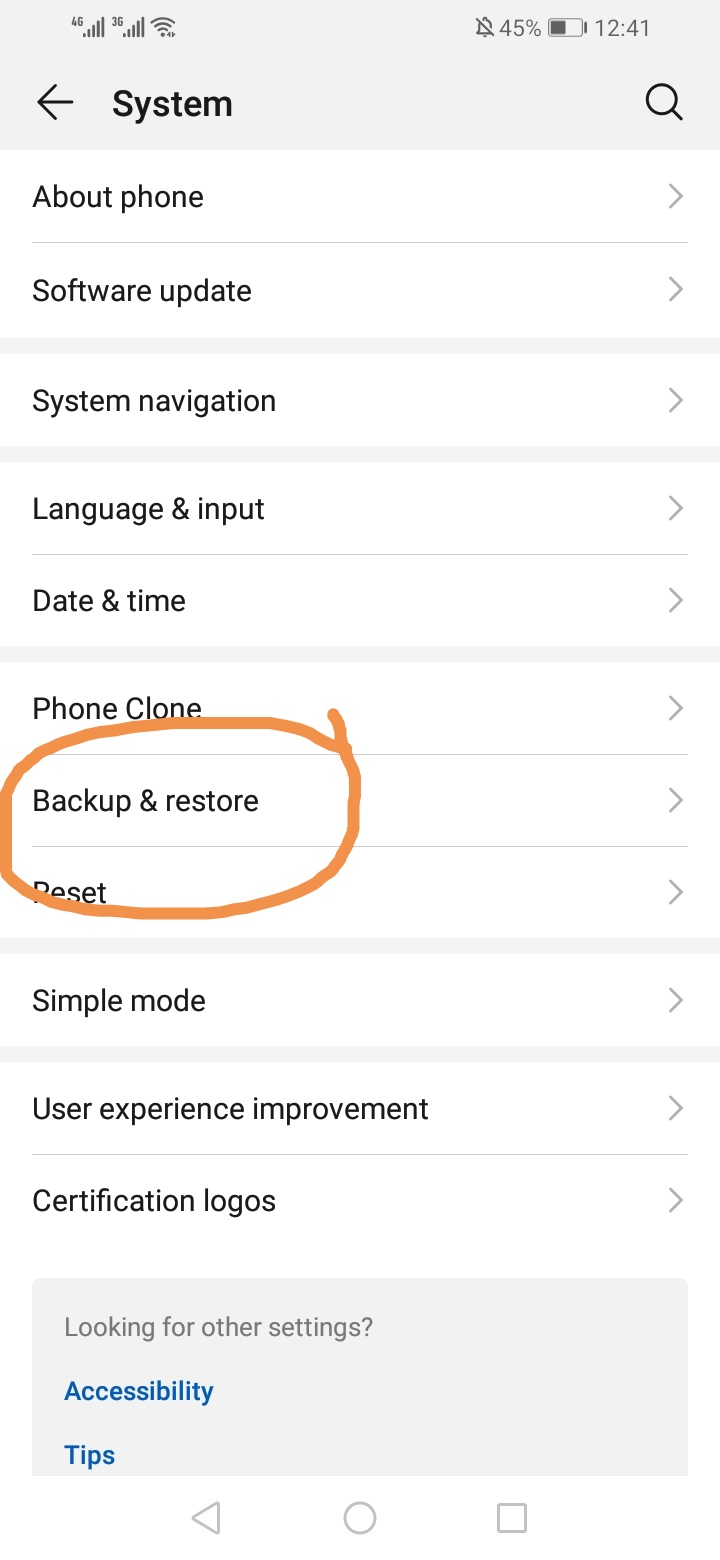
From the System menu, click on Backup & Restore.
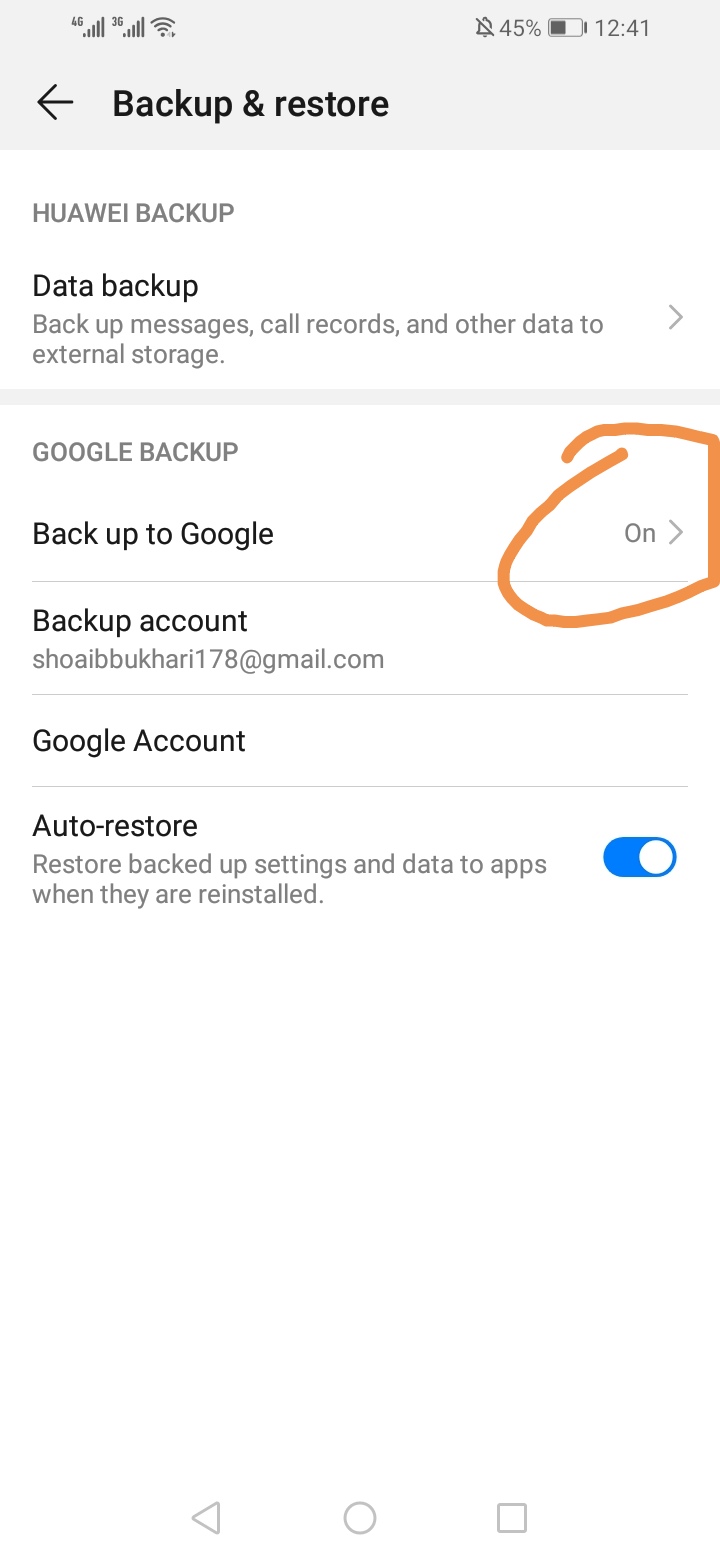
Now from the Backup and Restore menu, check if Back up to Google is turned on or not.
If not then tap on the Back up now to sync all the data on the phone with Google Drive.
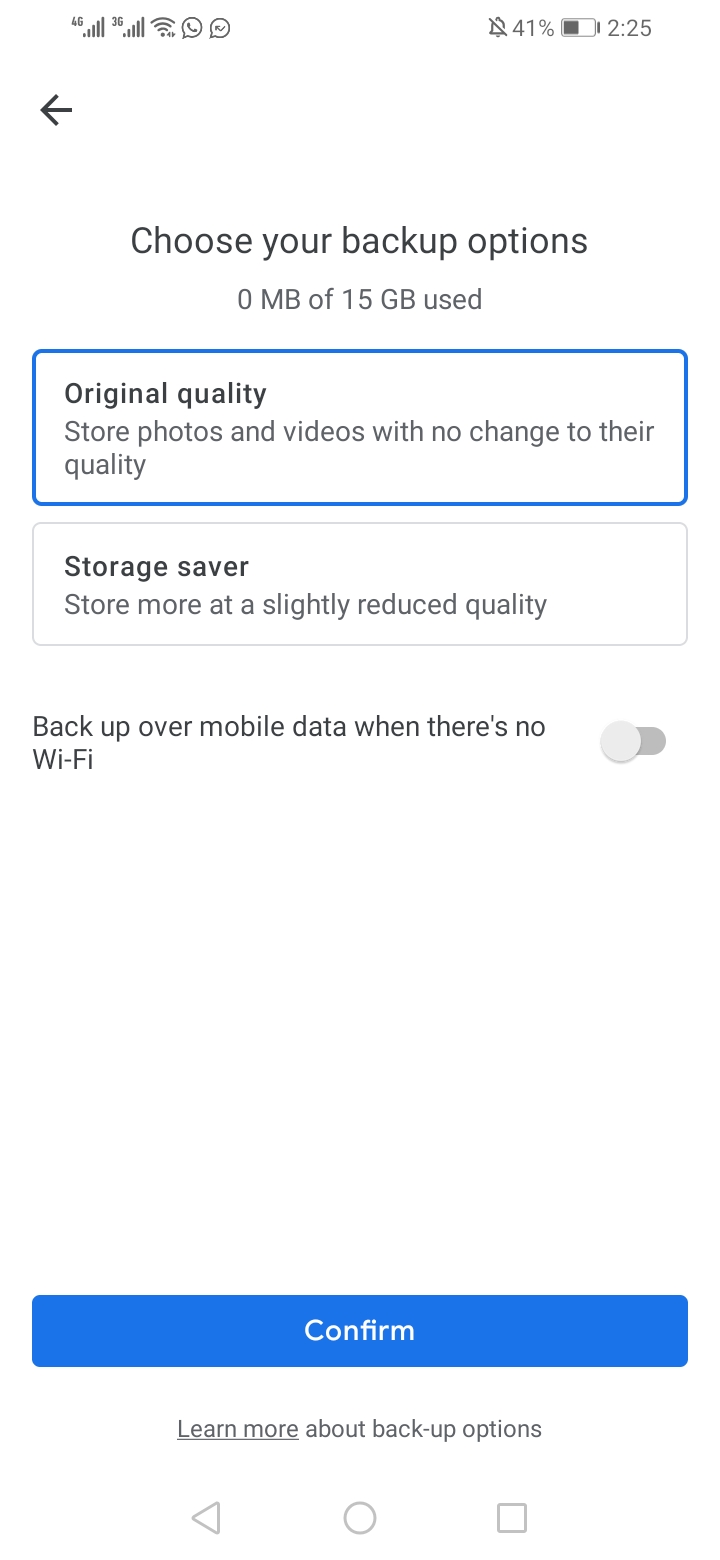
Once your data is backed up, you can set up your new Android phone. However, if you also want your photos and videos to be backed up, then you will have to follow the below-mentioned step: Step 2 (Backup your photos and videos on Google Photos): Google Photos is a remarkable platform for backing up photos and videos. The most captivating feature of Google Photos is the unlimited storage capacity at premium quality. It implies that you can save your photos and videos at Original quality or you can choose storage saver quality, which keeps the same level of detail while cutting down on the original size. Another thing that is pretty handy is the unlimited storage space if you select the storage saver option, and this feature makes Google Photos a remarkable service for storing your photos and videos. So first you will have to back up your photos and videos on your older Android phone.
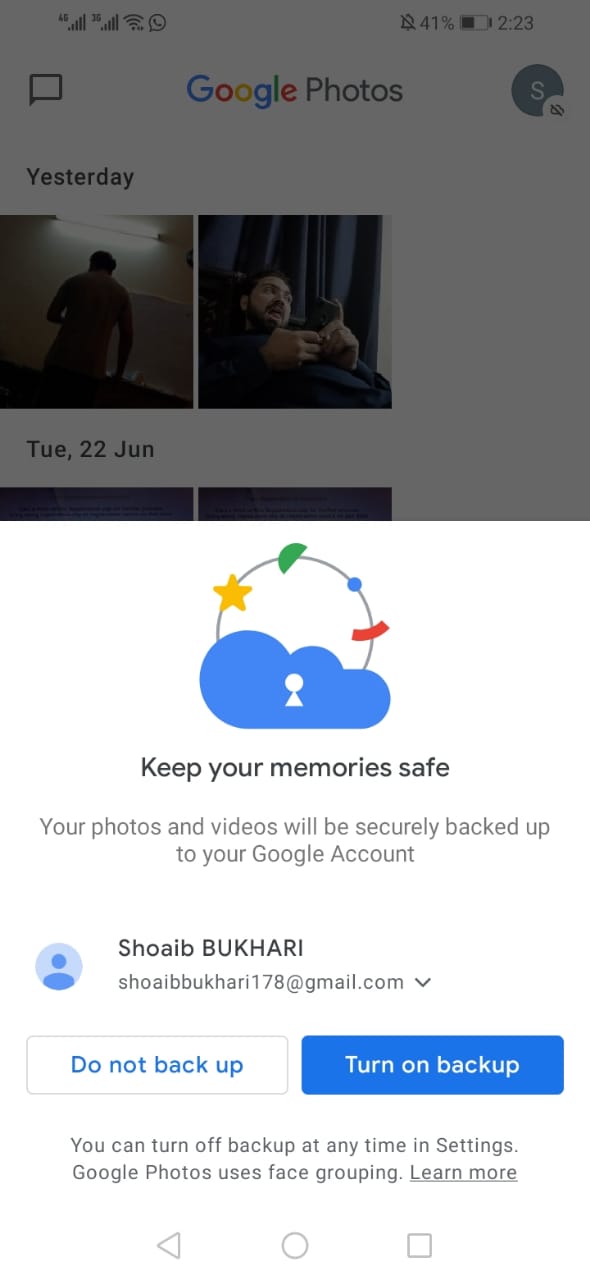
First, visit Google Photos on your phone.
Now you will be asked automatically about turning on the backup as you open the Photos app if you don’t have the backup turned on. So click on Turn on the backup as illustrated in the image.
As you turn on the backup, you will be asked about the qualities. As you can see in the image, you can either select the original quality or storage saver. Step 3 (Transfer Data From new Android Phone to Older one): Now you will need to unbox your new phone and get ready to set it up. There are numerous ways to restore data from an older device, however, I am going to mention the most convenient way for you. So follow the below-mentioned steps to transfer data from a new Android phone to an older one:
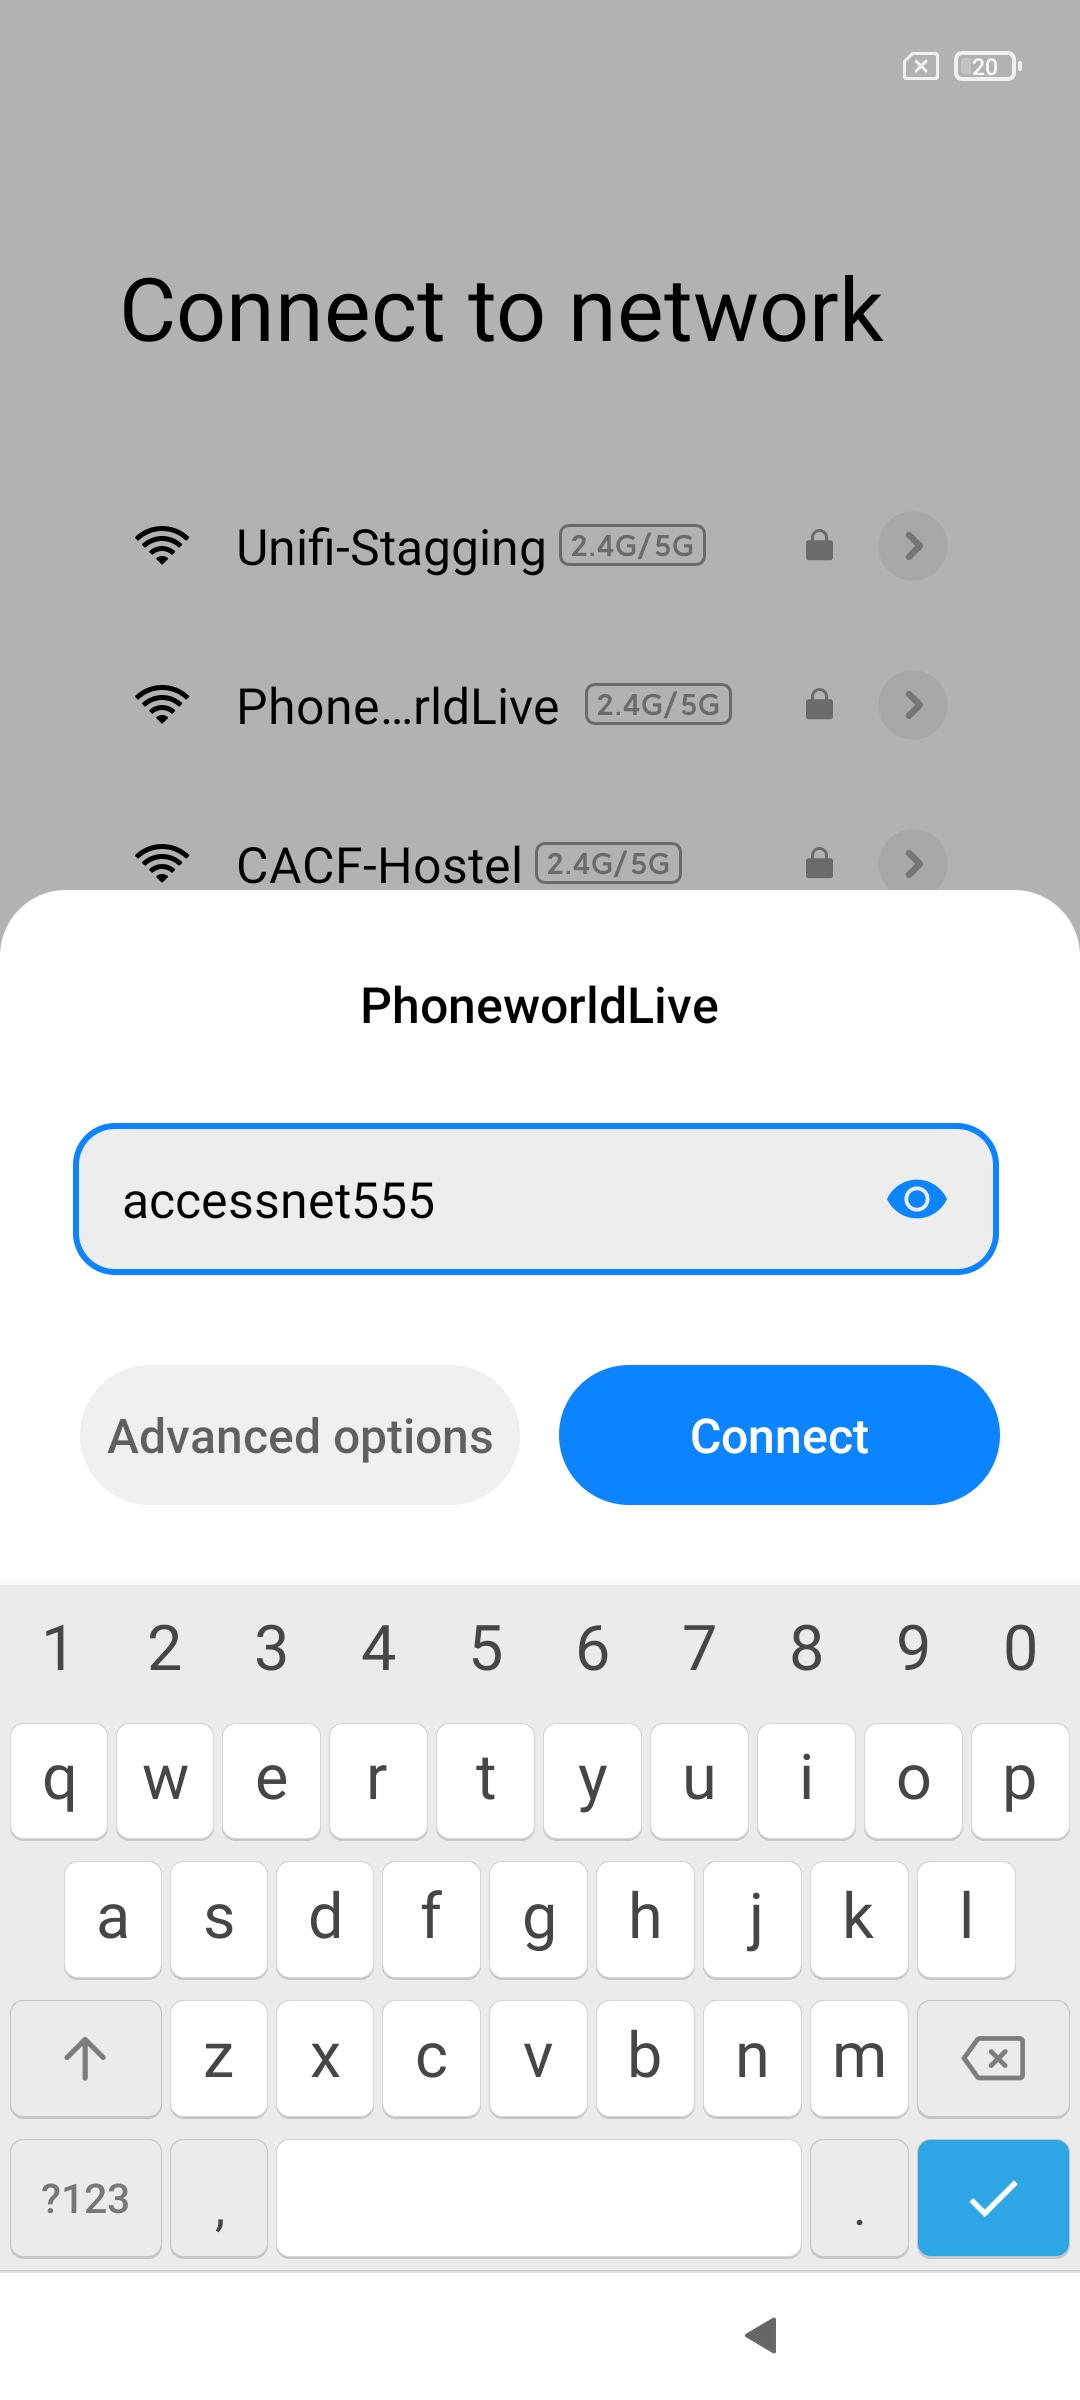
As you turn on your new Android device, you will be asked to choose a language, and afterward, click on start. Now choose your home Wi-Fi network and sign in as illustrated in the image.
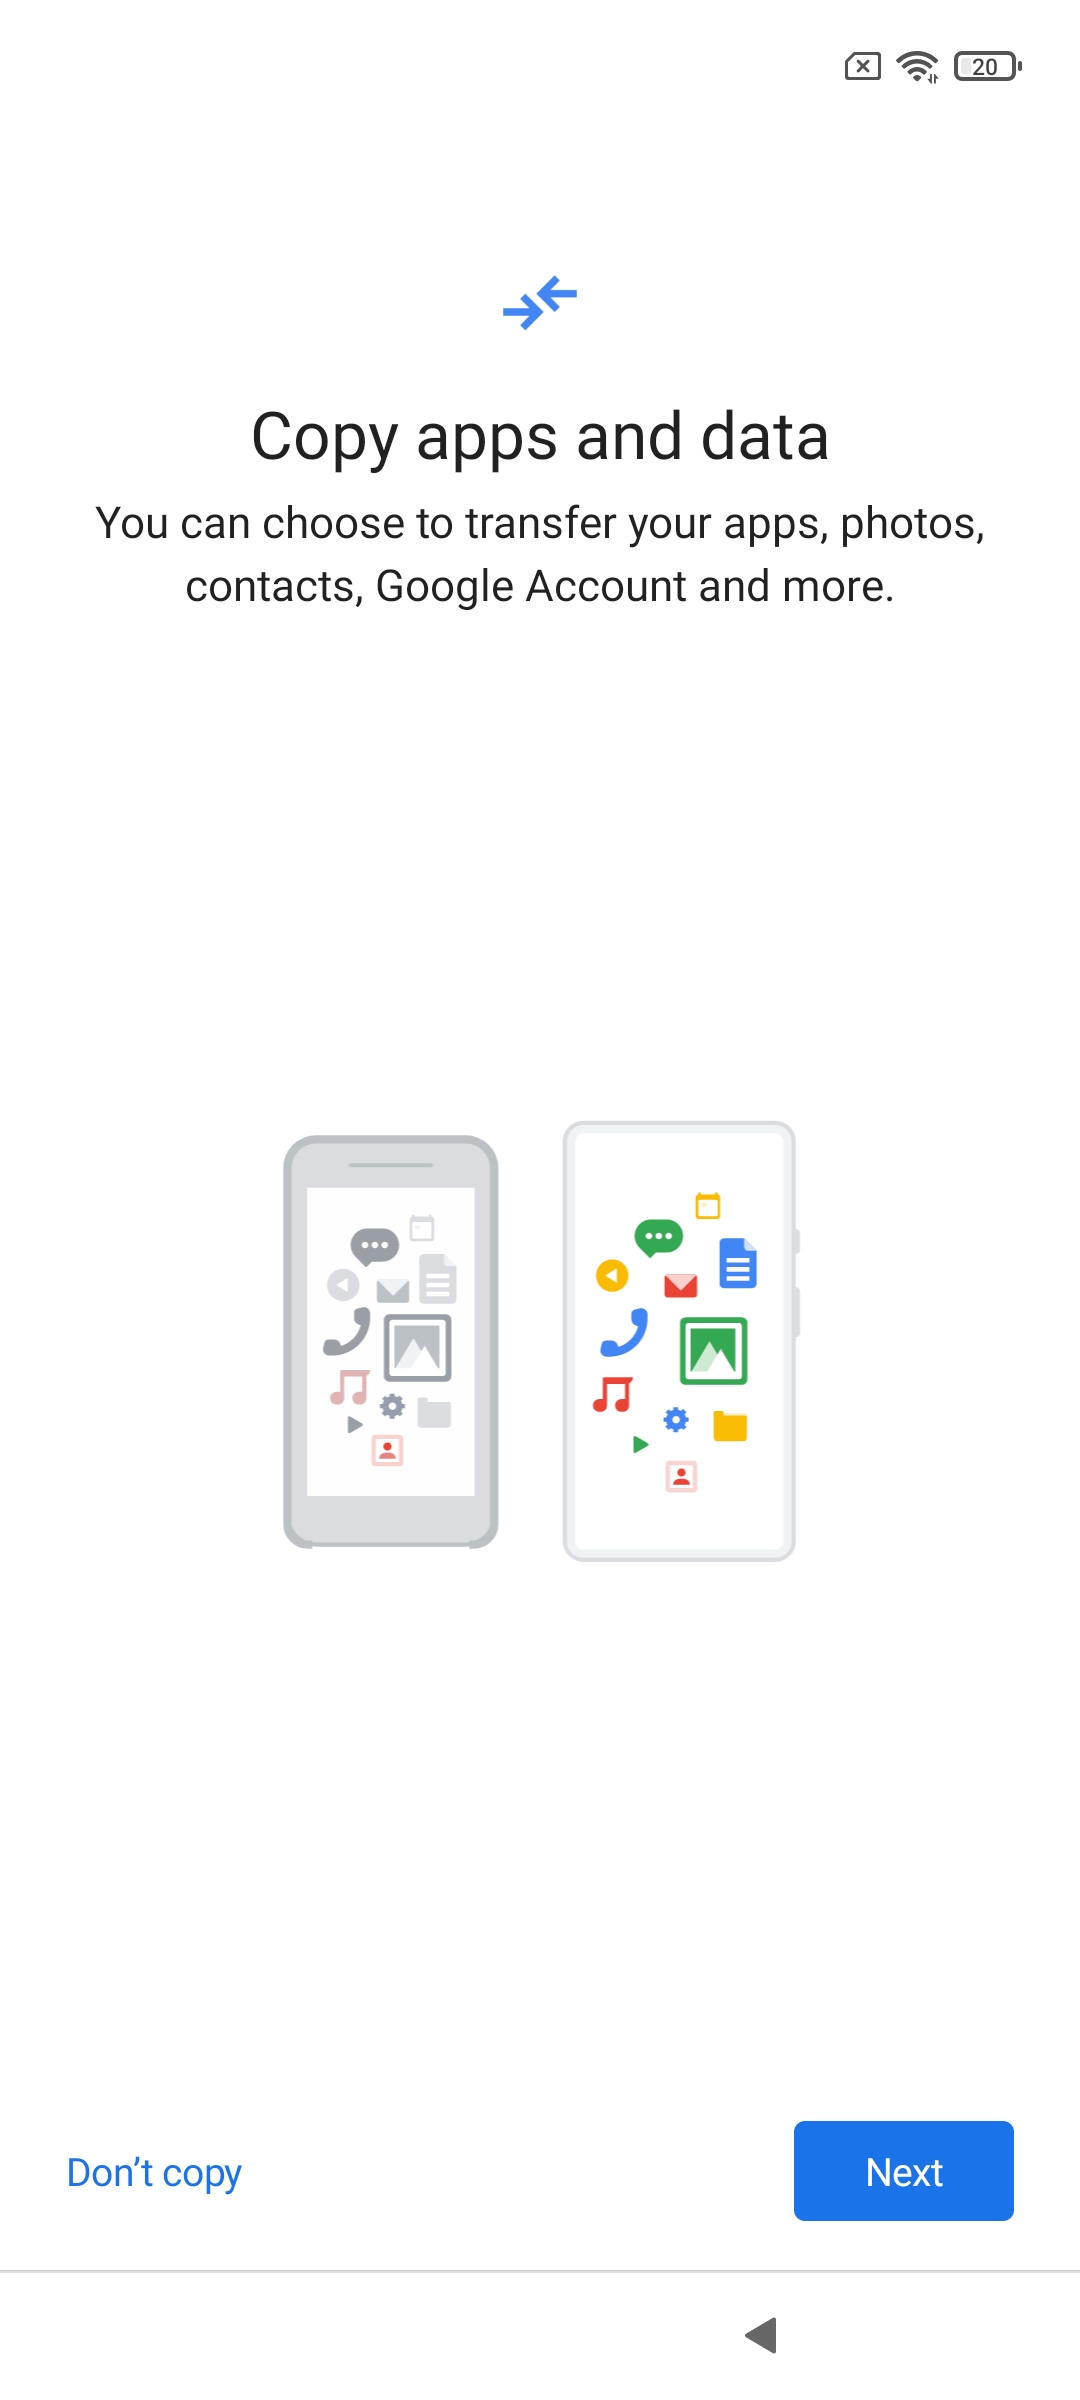
Afterward, you will be prompt to copy apps and data as shown in the image. Click on next.
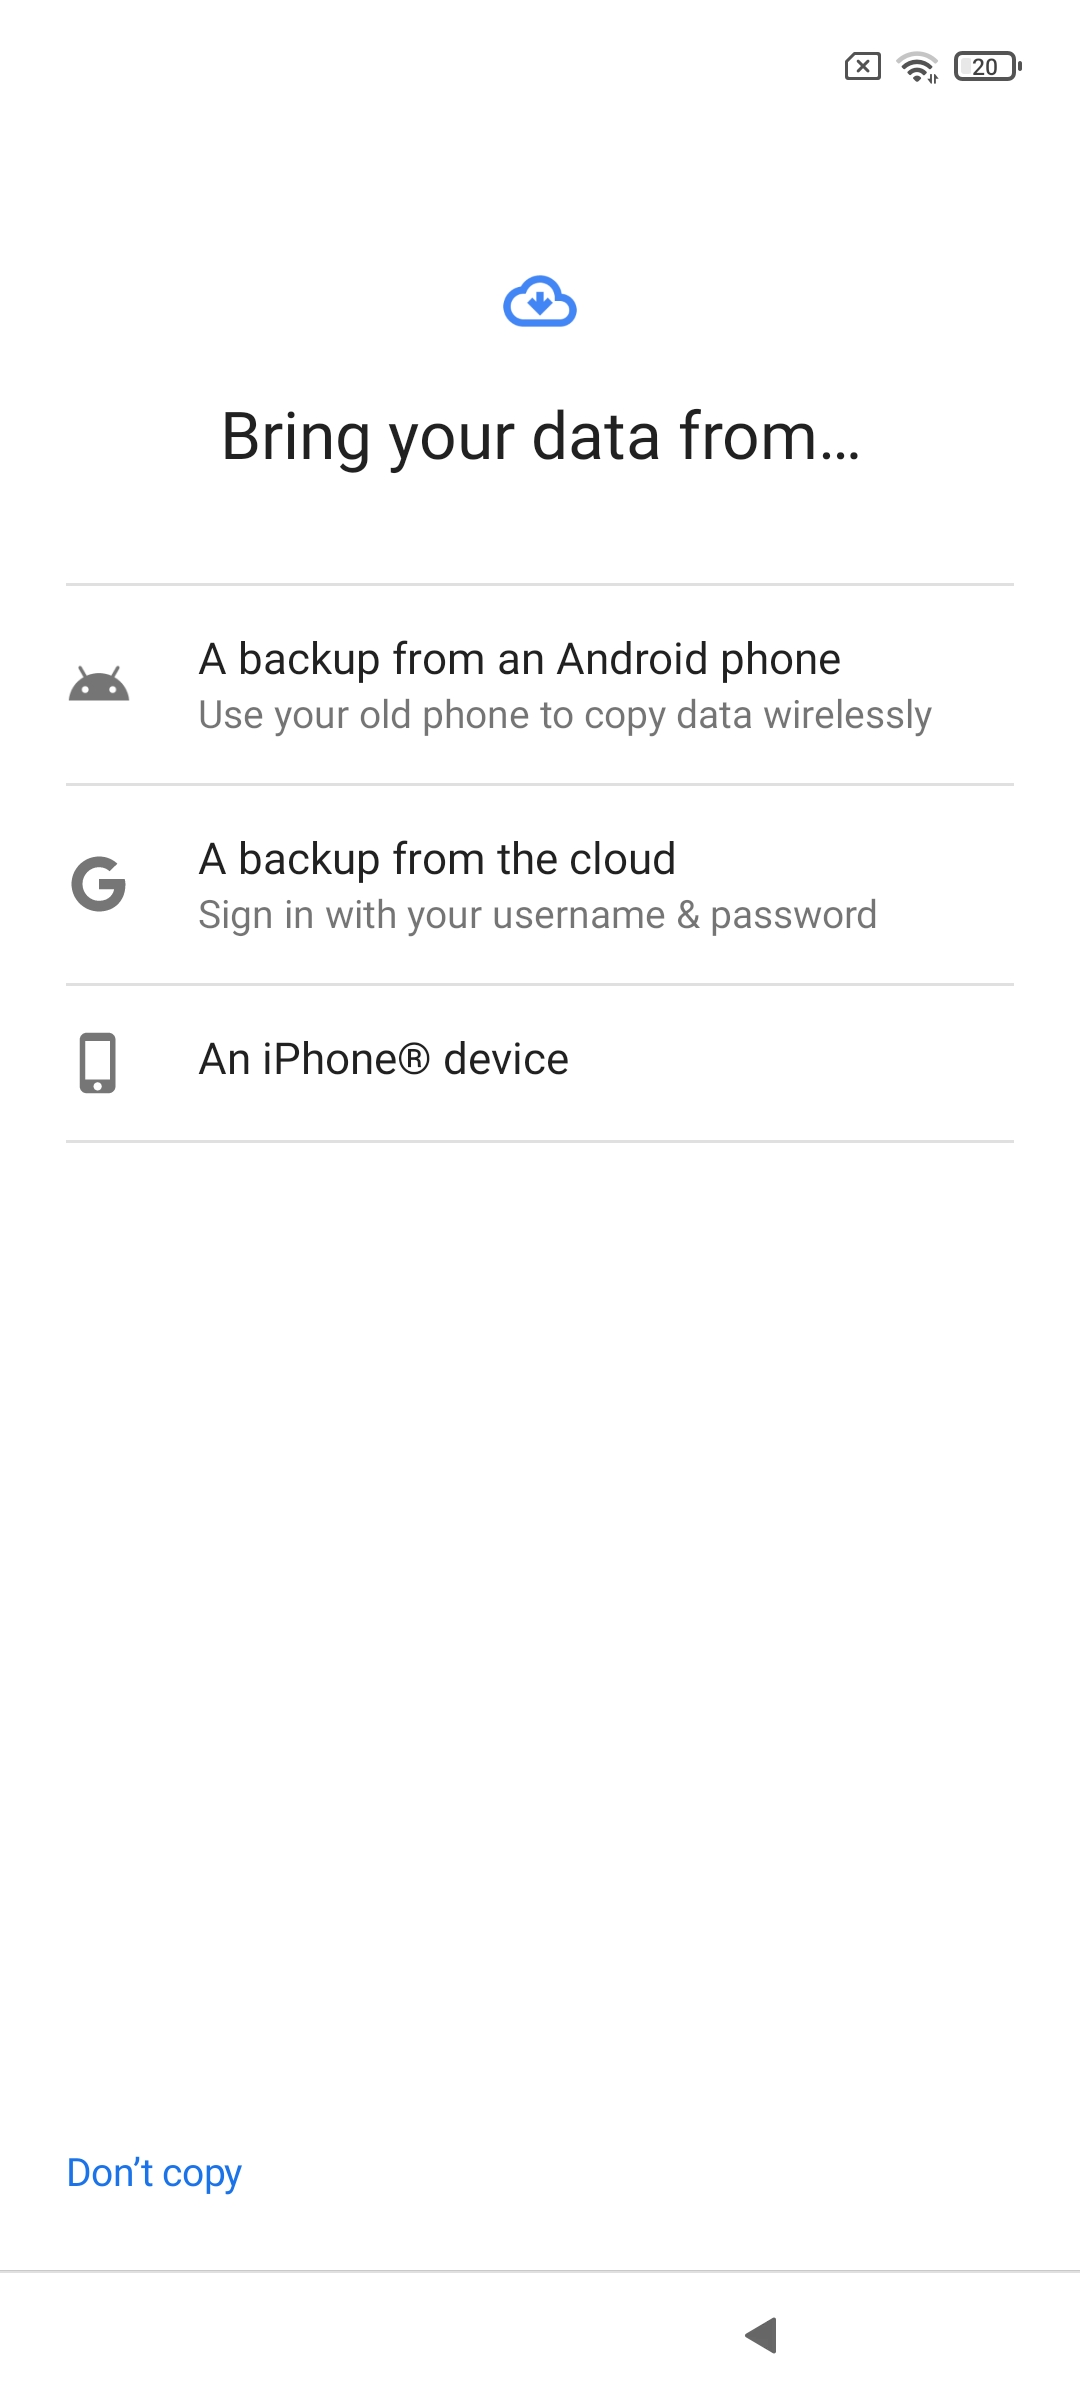
As you click on Next, you will be asked to transfer from three different sources. Tap on the first option ‘A backup from the Android device.’
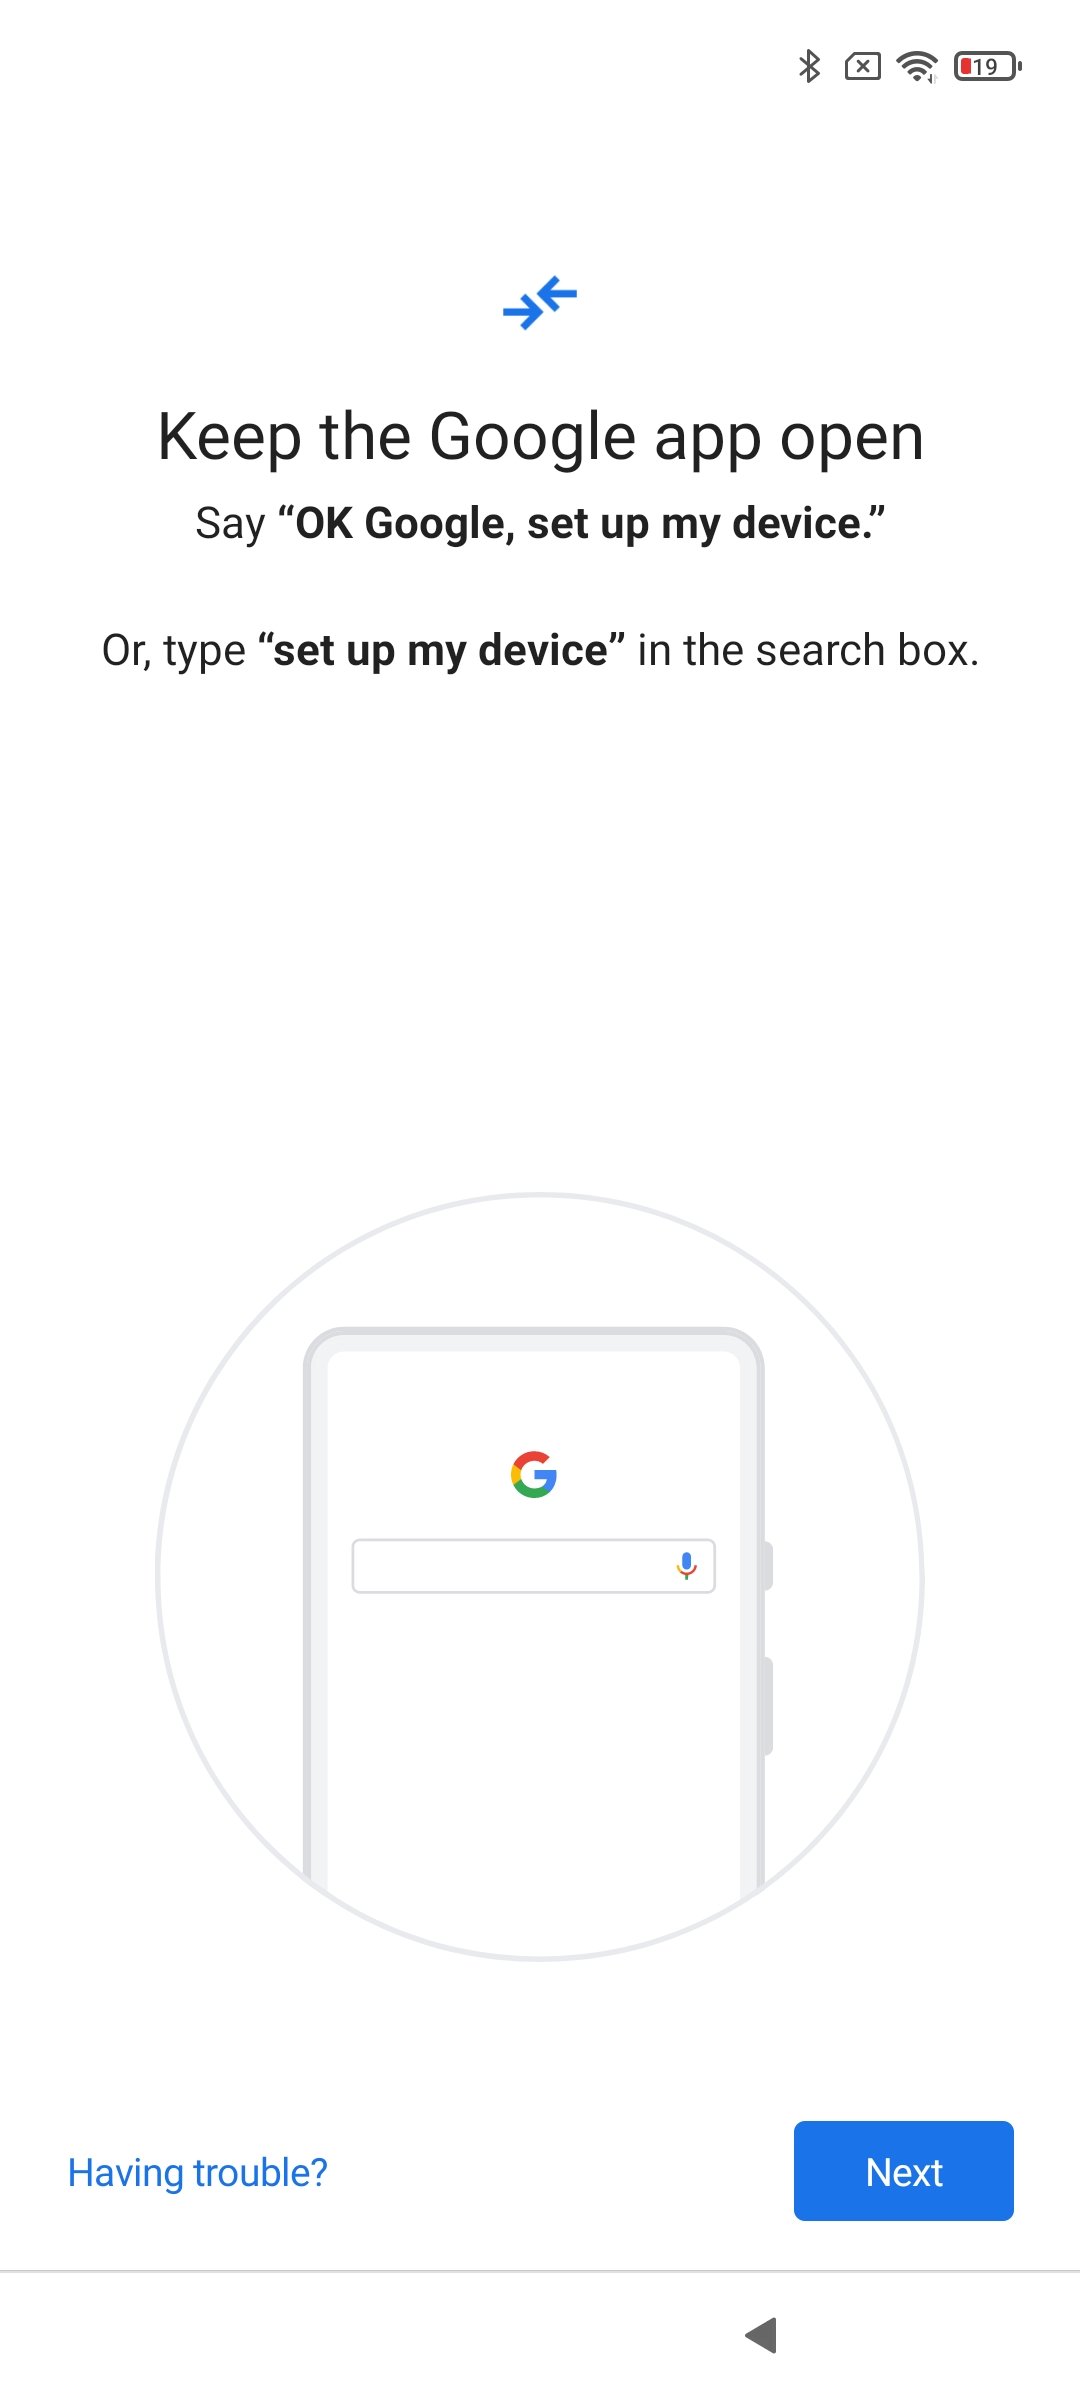
Now you will be asked to keep the Google app open on your older Android device as you can see in the image.
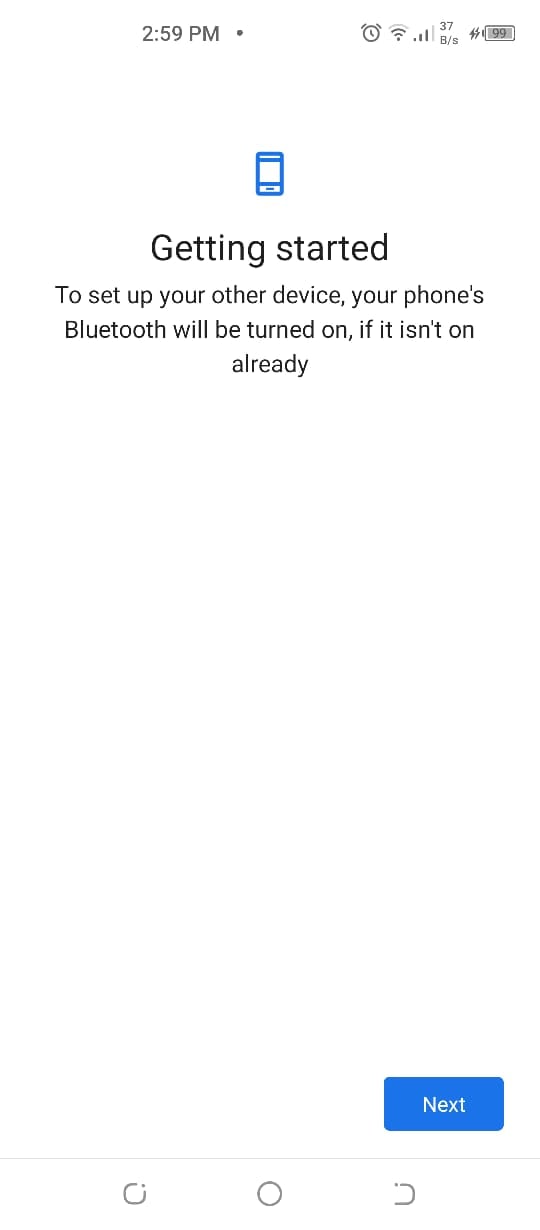
Head towards your older phone and open Google app on it. Afterward, say ‘Ok Google, set up my device’ or simply type the same query in the Google Search bar. As you do that, a getting started page will appear on your old phone, click on Next as shown in the image.
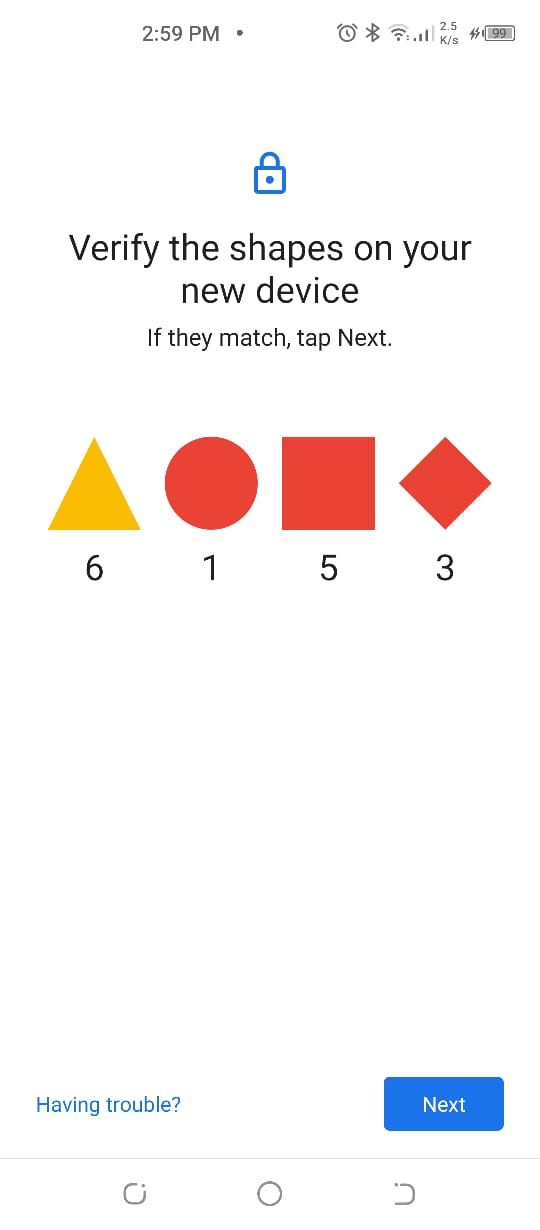
Afterward, verify the shapes on both the devices and click on Next as illustrated in the image.
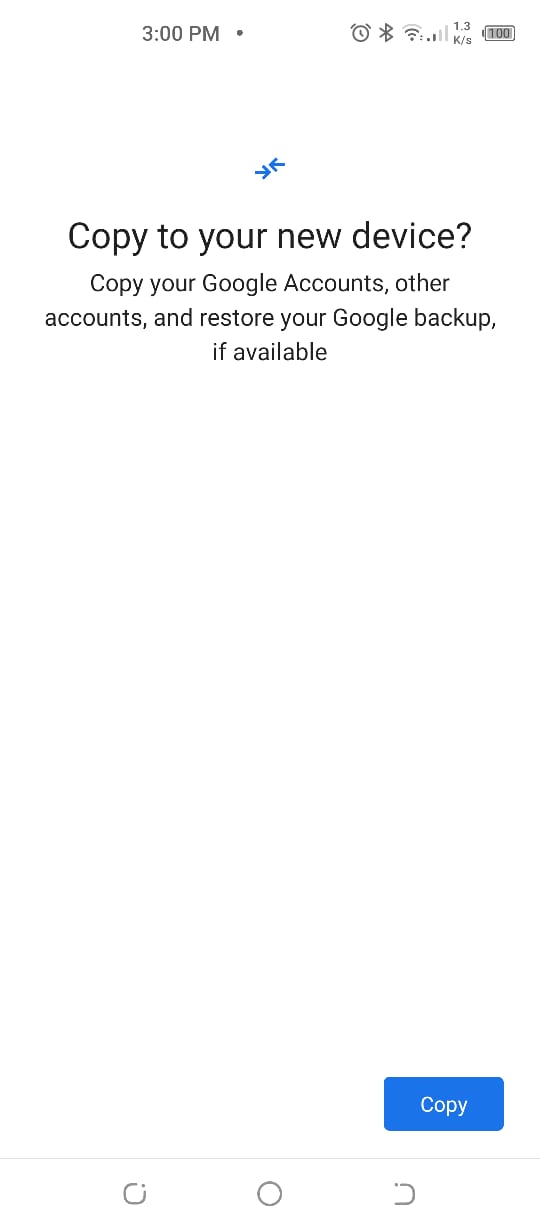
Finally, as you click on Next, you will be asked to ‘copy to your new device’ as you can see in the image. Click on copy and you will be able to transfer all your data from your older android to a new one.
Conclusion:
The above-mentioned guide is made after hours of research work. If you like our article or have any queries regarding it, do share them in the comment section! Check out? How to Fix ‘Unfortunately App has Stopped’ Error on Android? 7 Ways
